

The Parts You Need to Build a Hackintosh
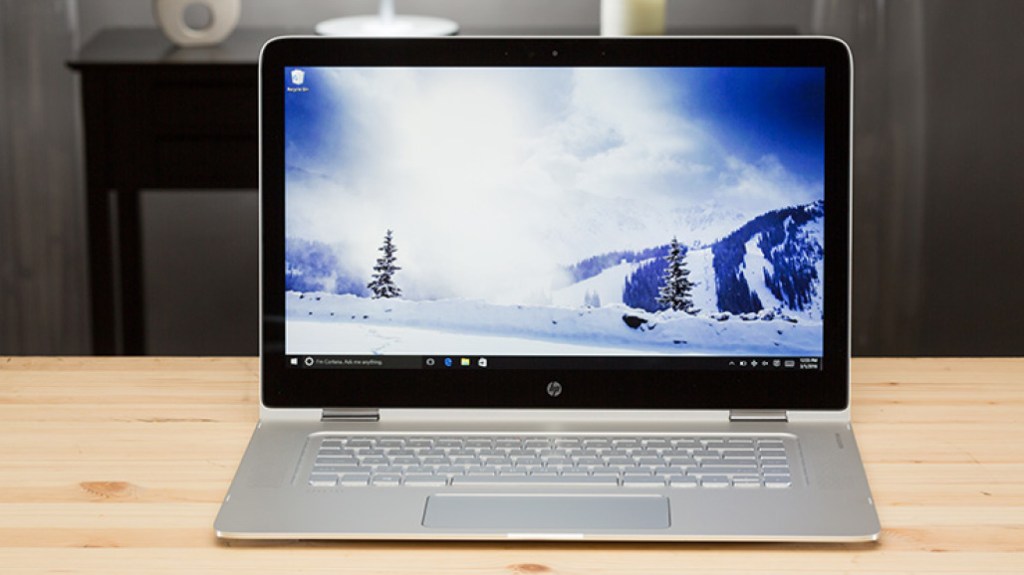
For this build, we’ll be using an HP Spectre x360 15-ap012dx (2016 version). It features a i7-6500u, Intel HD520 Graphics (you should not care about a dedicated GPU since Apple does not support Nvidia) and a 4K Touchscreen.
While this isn’t the latest model, if you’re Hackintoshing a laptop, you probably want something that’s been on the market a little while, as that means the community has had time to test it.
At $850 CAD (what I paid for on Ebay a year ago), this machine is priced much lower than current-gen Macs but still performs extremely well under most usage. It also has style—with its brass trims, and understated HP logo, it stands out in a room full of Apple machines.
Beyond its one USB-C ports (supporting Thunderbolt 3), the machine also packs a few things the current MacBook Pro does not, including 3 USB-A port, a better-than-Retina 4K screen, an HDMI port, and a keyboard with actual travel. The current MacBook Pro has a faster processor, but it’s also $1,000 more.
So why the 15-inch, rather than the 13-inch? Long story short: Upgradability. The 13-inch model has a lot of stuff soldered on, while the 15-inch variant allows you to remove components such as the RAM, the SSD, and (most importantly) the WiFi card. Some sellers of the 15-inch Spectre models are even putting 1-terabyte NVMe SSD cards in their systems by default.
If you want to go with the 13-inch machine, it’s possible, but you’ll have to have a WiFi dongle in your USB-A drive at all times. Them’s the breaks, unfortunately.
Other parts you’ll need:
- A USB 3.0 thumb drive (at least 16GB): 32Gb is preferred but 16Gb will do the job if you are working on a budget or do not have USB drives laying around. Do not use a USB 2.0 drive as the installation process will take much longer and might get painful!
- A Broadcom BCM94352Z m.2 WiFi card: This part, which can be found on either NewEgg or eBay, is specific for a reason: There aren’t a lot of wireless drivers natively supported by MacOS, and many, like the Intel card in this machine by default, aren’t supported. If you do opt for the 13-inch version of this machine or decide you don’t want to crack open your device, you will either need an external WiFi dongle, a way to plug into ethernet, or a phone to tether via USB. You won’t be able to use some of the niceties of the Apple ecosystem with a dongle—such as Handoff or iMessage—and additionally, it’d be taking up one of the three ports on this machine.
- A Torx T5 screwdriver, a Phillips head screwdriver, and a plastic opening tool: For opening up the machine, of course. iFixit offers a nice kit.
- A Mac that supports the OS you’re trying to install: This can be another Hackintosh or an older machine, by the way; just something you can use to actually build the boot disk.
- An external SSD (optional): Hackintosh-based machines don’t play very well with Apple’s next-generation APFS file system, the default in recent versions of MacOS. Using an external SSD allows a workaround for the older, more stable HFS+ file system. (It’s also great for peace of mind in case you want to do a test run before you go all-in on your install.)
The Software You Need to Build a Hackintosh
These are among the apps that you’ll need. For the most part (with some exceptions) you’ll download these onto an old Mac for either building your bootloader or later use on your Hackintosh. Here’s the list:
- OpenCore: This is your bootloader, which will allow you to boot into your copy of MacOS. This is where the magic happens, and it will live on your machine’s UEFI partition, where boot instructions live. (Note, this is simply a link to its documentation)
- OC Gen-X: This is what we will use to build our config.plist and gather our first essential kexts.
- ProperTree: This is our primary config.plist editor. It is especially designed to help with OpenCore configuration.
- MountEFI: Needed to mount the EFI partitions of drives as it is much easier than using Terminal commands.
- Apple’s Xcode (optional): This will be
necessaryoptional for editing your config.plist file, the file in your OC folder that tells the machine what to load during the boot process. Xcode is optional in this guide because we will be using ProperTree to handle the config.plist but Xcode can come in handy.
Prepping a Windows Laptop to Turn Into a Hackintosh
So after you’ve gathered your supplies and downloaded all the software you need, you’ll need to get your BIOS ready on your new machine. Start up into Windows and upgrade the BIOS based on the instructions from HP’s support website. Upon completion, hop into the BIOS (turn on your machine and hit esc and F10) and turn off some settings, including “Disable Virtualization Technology” and “Disable Secure Boot.”

Now might be a good time to replace your wireless card; the stock card will not work with MacOS. To do so, turn off the machine, set up a clean workspace, and unscrew the screws at the bottom of your laptop with your Torx T5 screwdriver and a Phillips-head screwdriver. You’ll run into three types of screws on the bottom: Six small Torx screws along the perimeter, two slightly longer Torx screws near the screen hinge, and under the rubber feet, two standard Phillips screws. Once those have been removed, you’ll need to run a plastic opener across the bottom edges to pull up the tabs holding down the metal on the machine—this will take a little time, but take care during the process.
Once you’re in, be sure to pull out the power cable connected to the battery with the help of the plastic opener, then pull out the tiny antennas attached to the Intel WiFi card, which is about the size of a postage stamp. (Need some help? iFixit has a guide that generally describes the process of removing and replacing an m.2 wireless card from a Lenovo Yoga; the process is similar for the Spectre.)


From there, unscrew the wireless card from the m.2 slot using a Phillips-head screwdriver, carefully install the Broadcom card you bought, securely fasten the antennas to the new card (and be careful doing so, as both the cables and card are fragile) and screw the new card in, then plug the power cable back into the battery and replace the case. (Test to confirm the WiFi and Bluetooth still works in Windows, of course. This also would be a good time to create a blank partition on your hard drive that can be replaced with MacOS, just an FYI.)
As hardware fixes go, it’s pretty painless.
How to Set Up the Hackintosh Bootloader
To preface here, you cannot make a Hackintosh without a lot of resources, and due to the number of technical issues involved here, I will refer repeatedly to Dortania’s OpenCore guide, since this is the primary ressource for this guide and most hackintoshers using OpenCore.
For one thing, this is a long article and it’s inevitable that you might find something confusing here if you’re following it exactly. I also want to make clear that, if something goes wrong, it’s a great resource for solving your problems.
Finally, we’re getting to the technical part. We’re going to want to build a USB drive for OC. Basically, you’ll be formatting your trusty USB drive to include a number of basic things that will be required for boot. This guide aims to advise you on this specific build; for more general advice, I’d recommend reading his guide for pointers as well.
To get Big Sur on your trusty hackintosh, the first thing you are going to need is a copy of Big Sur. You can get it through the Mac App Store (recommended), a patcher tool and other ressources as well (less recommended). Once you’ve found your prefered ressource, start the download (this will take some time, so feel free to continue and come back to this step later). Once the download is finished, Big Sur, much like other MacOS installers, should open automatically. Quit the application (right-click on Dock). The installer is now located in /Applications.
To build your disk, go to a Mac, put in your USB disk, and load up Disk Utility (/Applications/Utilities). From there, find your 16Gb+ USB Drive and click “Erase”. You should be prompted with a dialog box asking you the new name of the drive, the format and the scheme. I named my drive “USB”, format needs to be “MacOS Extended (Journaled)” and scheme “GUID Partition Map”.
Once Big Sur Installer is downloaded, open up Terminal (/Applications/Utilities) and run this command:
sudo /Applications/Install\ macOS\ Big\ Sur.app/Contents/Resources/createinstallmedia --volume /Volumes/MyVolume
Note: “MyVolume” needs to be the name of your newly formatted USB Drive.
The copy should take quite some time so you can continue following the guide.
From here, you’ll need to hop into OC Gen-X, where you’ll put the information you need into the bootloader. OC Gen-X is considered “unsigned” software, so you’ll need to right click on it to open it or otherwise give MacOS permission to run it.

The setup process is fairly straight forward, but I will walk you through it. First, you need to select your processor type (in our case, Skylake) and move on to the next part.

As far as Kexts go, select everything you think you might need or had if you were previously using Clover. Here’s a run down: Essential: Lilu, VirtualSMC (replace it with FakeSMC for full support), FakeSMC additional plugins (do not check VirtualSMC plugins), Graphics: WhateverGreen, Audio: AppleALC, Wifi and Bluetooth: AirportBcrmFixup.
Quick note: We use FakeSMC instead of VirtualSMC, because it seems, as per my experience, that there are still issues with VirtualSMC that were instantly fixed when using FakeSMC.
Once all your Kexts are selected, move on to “Firmware Drivers” and make sure both “OpenRuntime.efi” and “HfsPlus.efi” are selected.
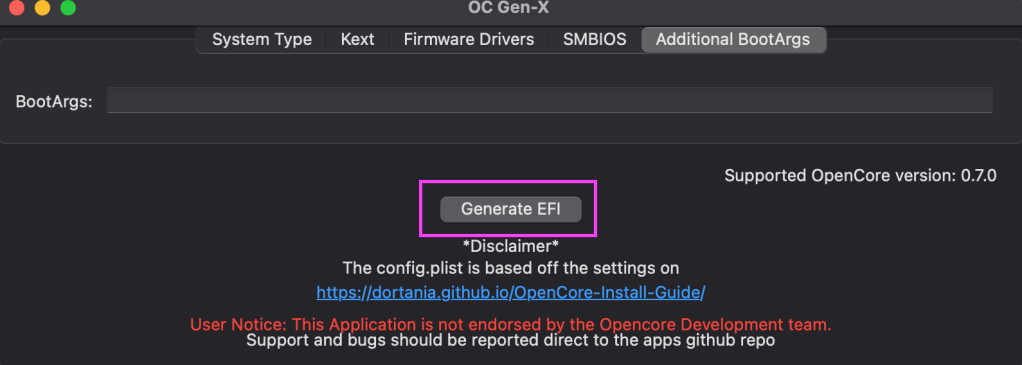
Move on to SMBIOS and write what you see on Dortania’s Guide under “info”, unless yours is already filled out like mine was (probably because I was already using a hackintosh).
Once all of this is done, click on “Generate EFI” and a new folder named “EFI” will appear on your Desktop.
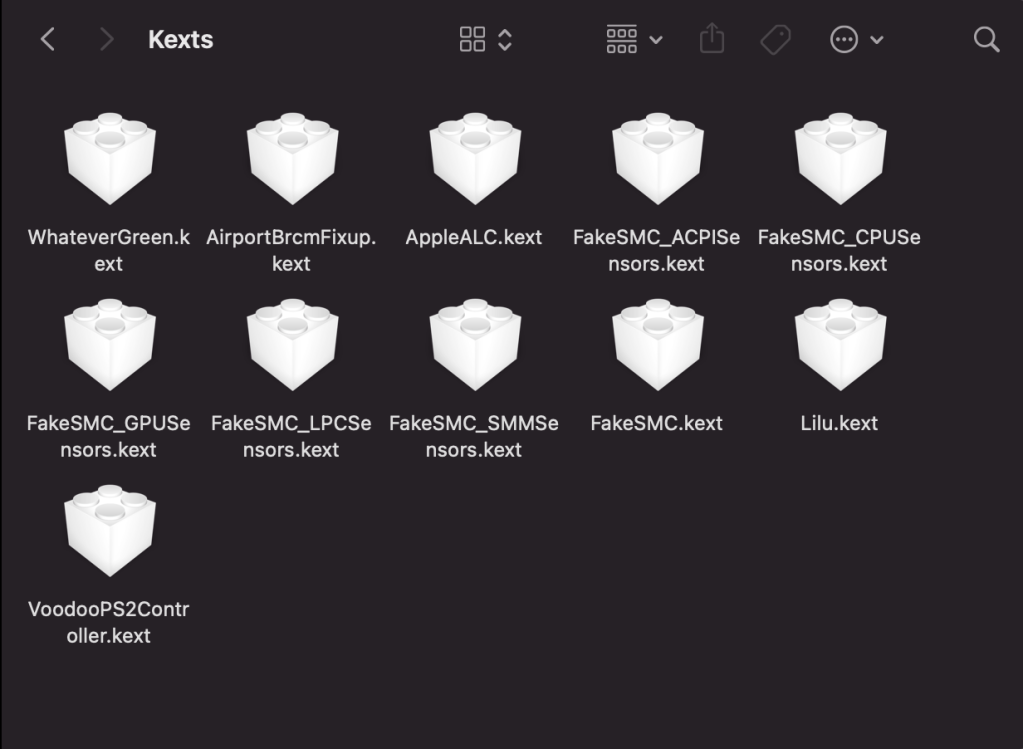
Now, since not all Kexts are available in OC Gen-X we still ned to install some to use our hackintosh (and for booting!). (Think of these the way you might think of drivers in Windows.) I personally use a handful on my boot disk, though you’ll install the bare minimum when you initially boot it. The files you’ll need, along with download links and basic explanation of what they do, include:
- FakeSMC.kext: This is where the magic happens. Basically, it’s the spoof that makes Hackintosh possible, as it mimics Apple’s System Management Controller.
- VoodooPS2Controller.kext: This adds basic keyboard and trackpad support.
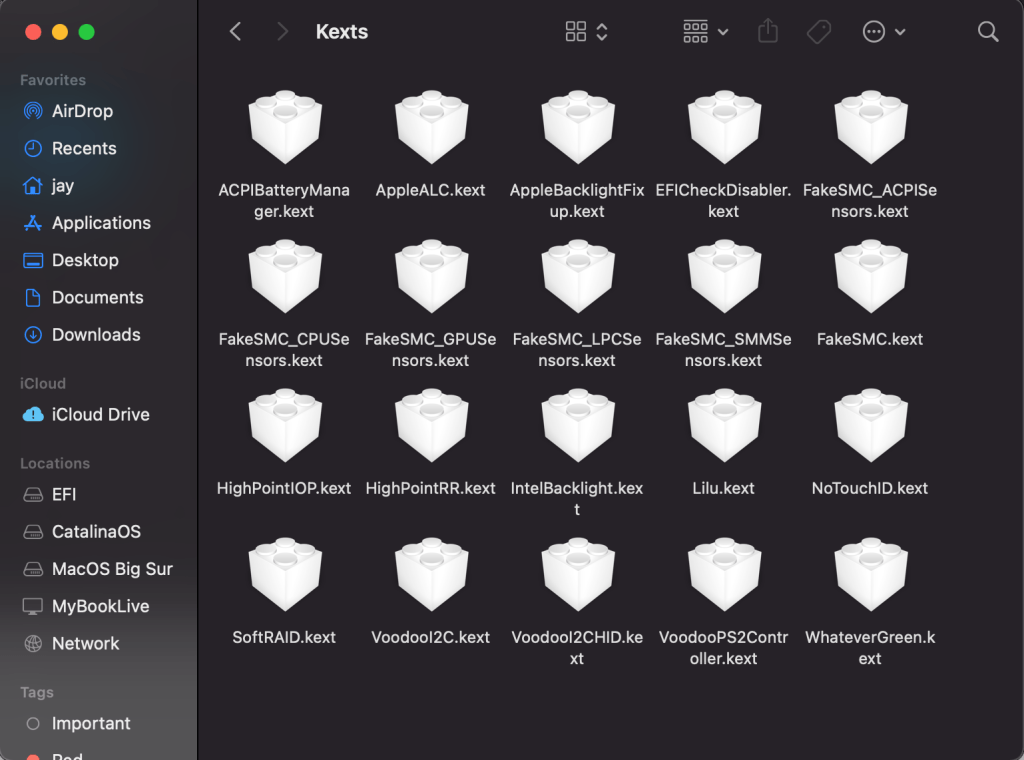
Once you’ve gathered the remaining Kexts, simply place them in “/Desktop/EFI/OC/Kexts”. The final result should look like this:
It’s important to note that you don’t necessarily want too many kexts at first. You will see that later on, we add some kexts that we previously didn’t have and the reason is simple: we want to install Mac OS as easily as possible and it is possible that one of the kexts you want/need won’t work Big Sur, so you want to limit everything before you are running Mac OS X.
Now, we need to add the SSDTs before we can move on. Download XOSI, PNLF, USBX and DRTNIA and place them in /Desktop/EFI/ACPI along with your old (or newly generated) DSDT.
Got all that done? Great! Now it’s time to pull up ProperTree, as we need to set up the Config.plist file , which manages the basic configuration of your MacOS install. Open ProperTree by opening “ProperTree.command” included in the ProperTree folder. Once opened, head over to “File”, click “Open” and locate the config.plist in your newly-generated EFI folder (/Desktop/EFI). You should then see something like this:

Click on “File” again, then OC Snapshop (Cmd+R) and select the EFI folder (/Desktop/EFI). Repeat the same process one more time but click on OC Clean Snapshot (Cmd+Shift+R) instead. This adds all Kexts and SSDTs to the config.plist without manual input, but it can make some mistakes so we need to check for those. Your list of SSDTs should look like mine (above picture, contained in the red rectangle) and your list of Kexts should be like this:
*Note that the first item of a list is always #0 (zero).

Make sure that your Kexts are in the same order as in the picture above, as most Kexts are co-dependent and need to be loaded in a more-or-less specific order, something that Clover does automatically. Make sure to look at the documentation before installing a new Kext. If your Kexts are not presented in that order, simply drag and drop them to the desired location.
There are a few more items that we need to add to the config.plist to make everything work, but you can simply head over to Dortania’s Guide and follow along. *Note: those are my boot arguments (boot-args): “-v keepsyms=1 debug=0x100 alcid=13 wegnoegpu”and I suggest you use the same ones. The only thing you might need to change is “alcid” which is specific to your audio card, but I suggest you try that one first. Once you think you have done everything, hit save (Cmd+S)!
Now, we can finally place our new EFI folder inside the Big Sur Installer! Open up “MountEFI” by opening up “MountEfi.command”. You should be presented with something like this:
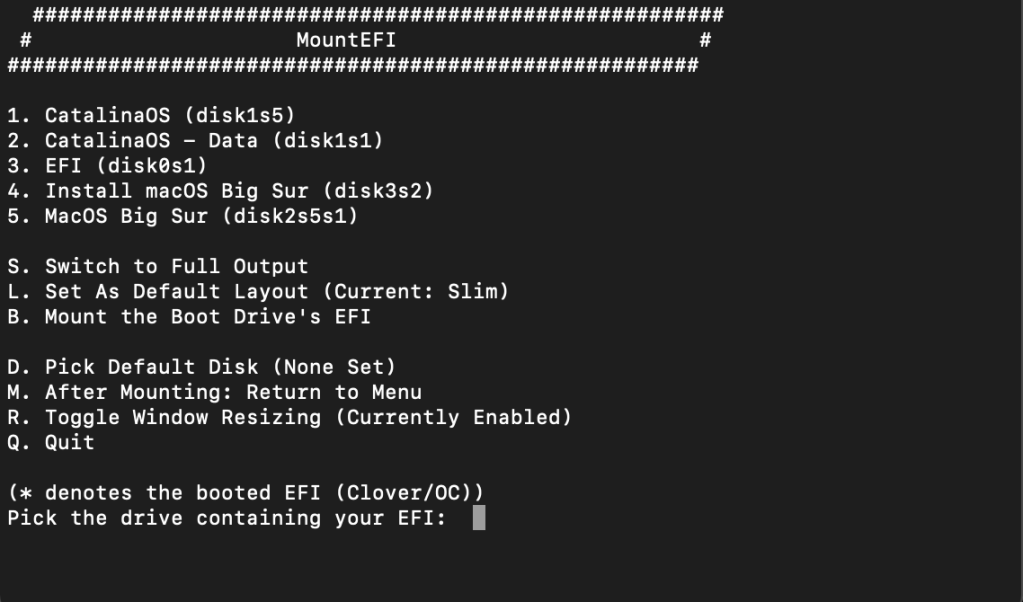
Locate your USB Drive (Install macOS Big Sur), enter its corresponding number (in my case, 4) and hit enter. You will be asked to enter your password and you should be prompted with message like this:
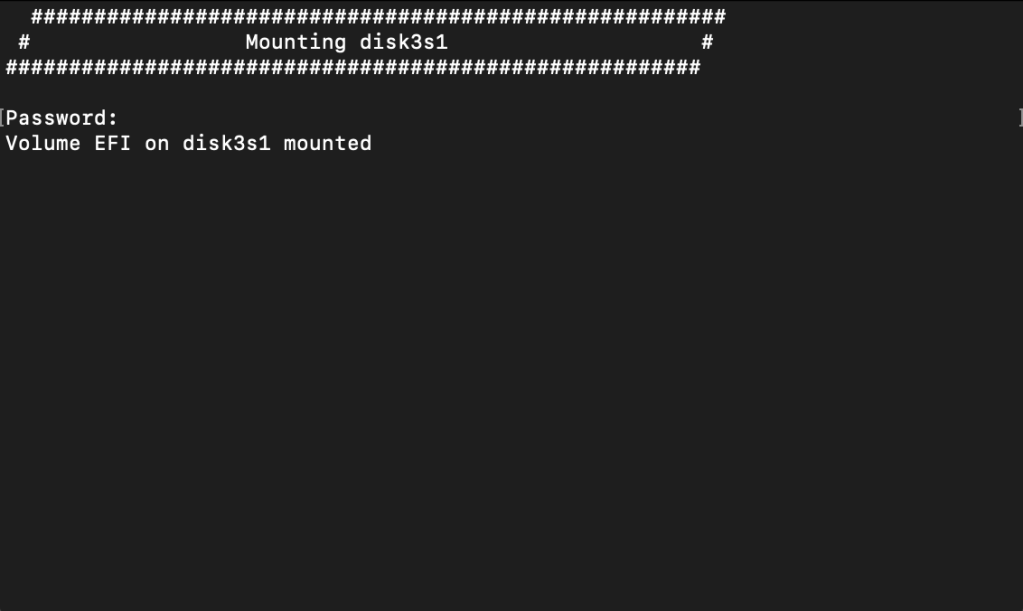
Open the EFI folder (find it in the “Locations” container in Finder) and copy-paste the folders (OC and Boot) contained in the EFI folder on your desktop (/Desktop/EFI).
Once you’ve copied your EFI to the USB, head over to your HP Spectre (or other Windows Laptop) and launch the BIOS (or UEFI). If you’ve made it this far, I assume you know how to do that.
In the BIOS, disable “Secure Boot” and make sure that all of your USB ports are enabled. Save and Exit and press the F12 key (we want to select the boot option, the specific key could either be “esc”, “f9”, “f10”, “f11” or “f12”). In the boot menu, select your USB stick (navigate with the arrow keys and select with the “Enter” key):
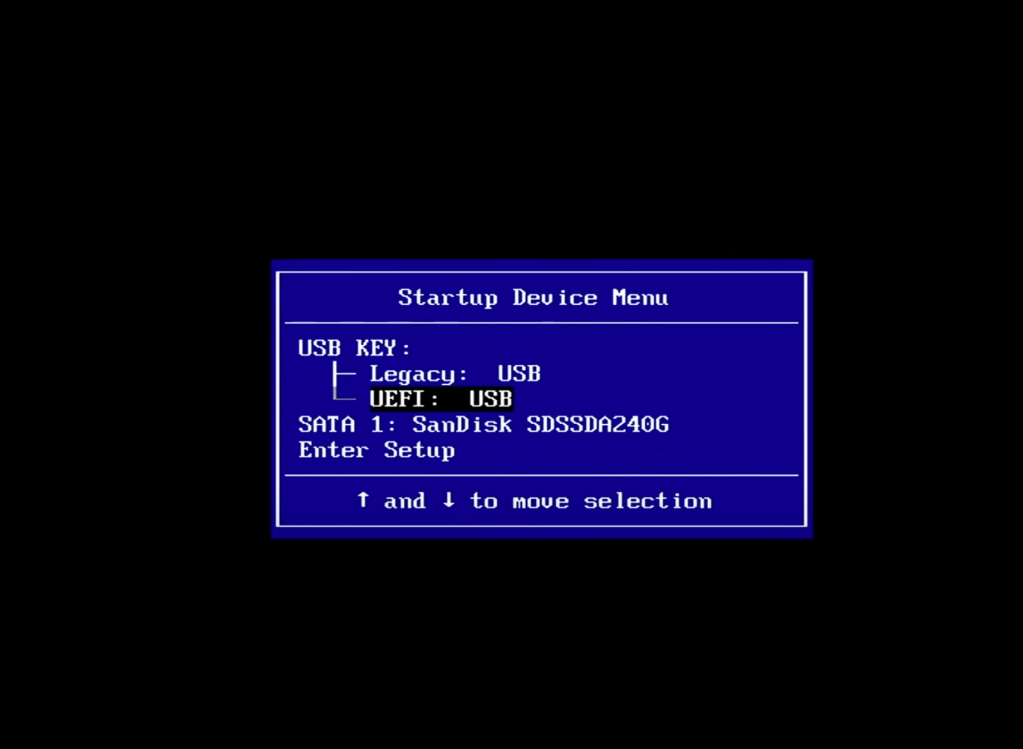
Note: yours could look different.
Aaand, finally start the installation by selecting “Install macOS Big Sur”:

Now, the fun begins. Wait a few seconds, read some text (just kidding, don’t read the text unless you have to!) and you will be prompted with the macOS installer. Select “Disk Utility”, locate your SSD and do what you need to do with it. I partitioned mine, but you can also simply erase it and start fresh. In either case, make sure that it is in the correct Format and Scheme (“APFS”, “GUID Partition Map”) and to give it a name you will remember:

Once you are done erasing/formatting or partitioning your drive, exit Disk Utility (red “X” in the top left of the screen) and select “Install macOS Big Sur” and follow the steps (mostly clicking “Continue” and selecting your newly formatted drive (you will also be able to select a partition if this is what you wish to do))
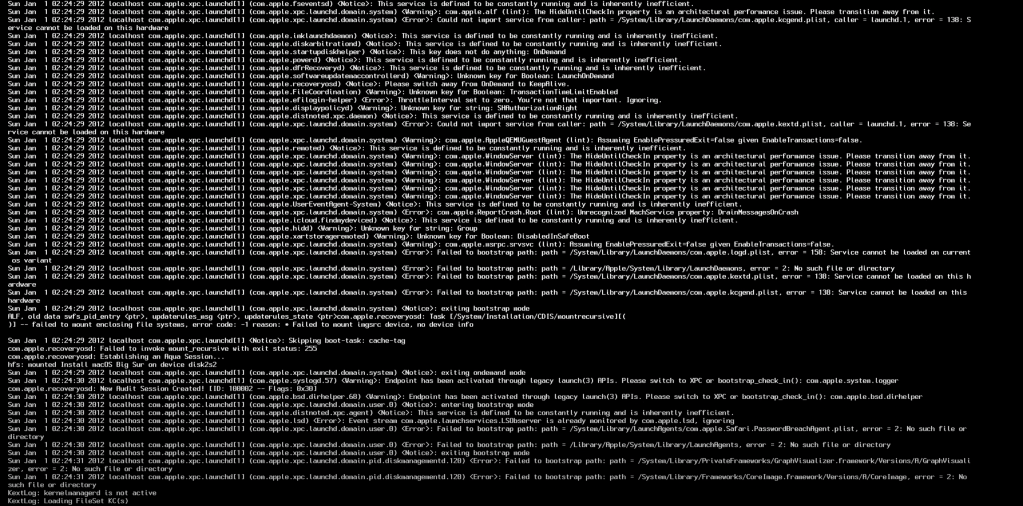
Once the installation begins (you will see a progress bar), it now becomes a patience game. You will see a bunch of text (see below) and a lot of restarts. Pay attention for the restarts, because you will have to do the same boot procedure every time: Boot Selection (procedure done before, select the USB drive) and in OpenCore, select a boot option called “macOS installer”. You should now start seeing a lot of text (just like the first time we booted the installer), and eventually the Apple Logo. This should happen more than once. Don’t panic, this is totally normal!

This will take a long time, but eventually, the installation will be close to done. You will know this, because instead of “macOS installer”, you will see the name of the drive/partition where you installed macOS in OpenCore. Select it and macOS will either continue installing or, eventually, boot directly. When it finally boots, follow the set up instructions (Country, Language, Account, etc.). Congratulations, you now have a Mac! Well, we’re not entirely done yet.
Once you are on the MacOS desktop, we need to copy the EFI in the USB Stick in the new macOS drive/partition. Head over to Safari and download MountEFI (again!) and run MountEFI.command. Just like when you first did it, Locate your USB Stick (Install macOS Big Sur), enter its corresponding number (in my case, 4) and hit enter. Enter your password and open the EFI (find it in the “Locations” container in Finder). Head back over to MountEFI and do the same procedure, but make sure to select your new drive/partition. Open it up.
You are now presented with two Folders containing a folder named “EFI”. You need to replace the EFI folder in your new drive/partition with the EFI in the USB Stick. Simply drag and drop and select “replace”. Once this is done, eject the USB Stick (select “eject all” so the EFI goes away too!)
Quick tip: In order to identify which EFI is which, open up the folder and check what is inside. The EFI folder in your new drive/partition will only contain a folder called “APPLE” while the EFI in your USB Stick will have folders called “OC” and “BOOT”.
If you haven’t specified a SMBIOS before, feel free to use GenSMBIOS to do so, I will skip this step since I have previously done this with Clover.
At this point, we will strictly be working with the EFI in our new drive/partition. It is not time to install the remaining Kexts (follow the steps above when we first installed kexts). Your Kexts folder should look similar to this:
In order to “activate” the kexts, you need to restart your computer. So, once all the kexts are in the folder and in the “config.plist”, restart your computer.
Congralutations, you now have a “fully functional” hackintosh and thank you for reading this far!
